


 |
| Pendant, Cartier Paris, 1912, platinum, old-cut and rose-cut round diamonds, two cabochon-cut star sapphires (13,45 and 1,98 carats), round and drop-shaped pearls, engraved rock crystal, millegrain. Origin: Mr and Mrs Stephen Silver. This is one of Cartier’s first creation using rock crystal. |
Jewellery masterpieces. Antique pendant by Cartier
Friday, August 21, 2015

Jewellery history. Multiple ear piercing
I have come across this curious article (it is in Italian, so you will need to use an automated translation to read it). In case you had multiple piercing and thought you were modern... In fact, you are very much old-fashioned! :) The lady in the picture is Infanta Maria of Guimarães (12 August 1538 – 7 September 1577) was a Portuguese princess.
She was not the only one who had multiple ear piercing! Follow the link above to the original article and you will find more portraits of the ladies who lived at the same time.

Interesting how it works... You know how people see some star wearing something and everybody wants it? That never worked for me. However, knowing that that was a style of a medieval princess... makes me regret that I do not have multiple piercing like this! :)
Throwback Thursday
Thursday, August 20, 2015
I was very jealous when I was taking this picture of my husband feeding three kangaroos! Just until that moment when I got to feed a kangaroo mommy with a baby kangaroo in her pouch :)

Round-up of Paper Gems patterns for party decor
When I decided to find paper gems patterns I did not even expect to find anything as nice as the first two links. What I was looking for was the schemes of paper crystal systems just like those that I had in my gemology course. Unfortunately I have not keep them for all these years, but I hoped to find the same. I've found them. The 3rd link will take you to a pdf file with a few simple crystal systems' schemes. The forth link is for those who wants to do something really nerdy :)
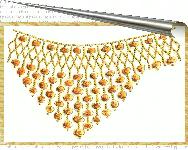
 |
| Fancy paper gems |
 |
| 3d paper diamonds |
 |
| Crystal systems (pdf) |
 |
| Crystallography and Minerals Arranged by Crystal Form |
More ideas on my pinboard:
Beautiful nature
Wednesday, August 19, 2015
I took this picture at the Botanical garden in Brisbane, Australia. Brisbane is a warm place with no winter, but this plant grew in a greenhouse! Not sure where it originates from, but it should be even a warmer place for sure!

Apple pie
Anna keeps treating us with her delicious recipes! Cannot wait to have a reason to cook this one! (Yes, I do need a good reason, as I am not nearly as good at cooking)
You can see all Anna's guest posts here.

Ingredients:
To make the dough you will need:
Flour - 0,5 lb (250 g)
Corn flour (needs to be very fine). You may use another kind if you do not have corn flour - 3 oz (85 g)Baking powder - 1 tsp
Butter - 6 oz (180 g)
Sugar - 3 oz (90 g)
1 egg
To make the topping you will need:
4-6 apples
Sugar - 5 oz (140 g)
Butter - 1,5 oz (40 g)
Lemon juice - 1 tablespoons
Cinnamon - 1 tsp.
Wheat flower - 2 tablespoons
Water - 3 tablespoons
You may add some nuts if you like (I like adding almonds)
1. Sift all the flour and the baking powder into a bowl. Add finely sliced butter. Stir the dough using your hands. You will get a very dry dough that falls apart. This is normal!
Add the sugar and a pinch of salt. Mix everything well. Beat up the egg lightly; add it to your dough. Knead the dough thoroughly using your hands, until smooth. Sprinkle it with flower and wrap it with plastic wrap. Place it in fridge while preparing the topping.
2. Peal the apples and remove seeds. Melt the butter in a deep frying pan. Put the apples in it, add lemon juice, sugar, cinnamon; mix everything well. Cover and simmer until tender. It will take about 10 minutes.
3. Mix flour and water together; then add it to the apples. Simmer for 2-3 minutes; then remove the topping from the pan into a bowl for cooling down.
4. Remove the dough from the refrigerator. Roll out the 2/3's of the dough to the size of your baking dish. Oil the baking dish with the butter and place your rolled dough into it. Spread the topping. Use the left over dough to make a lattice and join the edges of the bottom dough and the lattice.
5 Bake your pie in the oven at 395 F for 40-60 minutes until golden brown color. Note, the baking time depends on the diameter of your baking dish.
Bon appetit!
Bon appetit!
Jewellery masterpieces. Jewellery by Eve Llyndorah
Tuesday, August 18, 2015
 |
| Persephone brooch by Eve Llyndorah |
Christmas tree ball decoration
Katya Ryazanova is kindly sharing her second DIY in our blog. Thank you, Katya! (Katya wrote a few guest posts for the blog. You can find all her DIY posts here.). I have never seen a Christmas decoration like this before. Just magical!
-----
This is a list of supplies that I needed to decorate this Christmas tree ball:
- a plastic or papier-mache ball
- a white acrylic primer or an art primer
- a napkin or a decoupage card with a desired picture
- two colors of acrylic paint to create craquelure surface
- A one-step craquelure lacquer
- An acrylic lacquer
- Contour for glass
- Paint to create "pearls"
- Strips of organza and/or atlas
- Abrasive sponge or fine sandpaper

I chose a spot on my ball where I wanted to place my decoupage motif; then covered it with the primer (you can also use the white acrylic paint instead). I let it dry, then attached my motif. I attached it with water and then soaked it with the acrylic lacquer right away. Then I let it dry well and coated it with the lacquer again. I used fine sandpaper to polish it.

Now it is time to take care of the rest of the surface of the ball. Go with your sandpaper over it if the ball is plastic. You will need to make the surface slightly rough for the better adhesion of the acrylic paint.
I applied the bottom layer of the brown acrylic paint with a brush (or a sponge can be used instead). Then I let it dry and covered it with a one-step craquelure lacquer.

It needed to be left to dry until I could touch it. Then I applied the second layer of the pink acrylic paint. The cracks appeared immediately!

I left it till the next morning to dry up. I covered the ball with several layers of varnish (letting each layer to dry well). It also needed to be polished with a fine sandpaper at the end.

Finally it was time to decorate the ball with some "bronze" and "pearls"! I used acrylic contour for glass. It started to look even more delicate and elegant when I added "pearls" with the pearl paint!

The last touch is to attach a ribbon. The toy is ready to take the best place on my Christmas tree!

Katya's etsy shop: https://www.etsy.com/ca/shop/KatyaCoil
Katya's shop for the Russian-speaking customers: http://www.livemaster.ru/coil

Monday Party Nails design
Monday, August 17, 2015
I love this nail design idea for summer! The colors stand out and this is exactly what you want for a bright sunny day! :)


Subscribe to:
Posts (Atom)