


 |
| Brooch | Michelle Ong for Carnet. "Feather/Precious Plume". White and Yellow Diamond, Ruby and Amethyst set in Platinum and Titanium. |
#jewellerymasterpieces Michelle Ong
Tuesday, April 12, 2016

#jewelleryfacts365 72/365 Pearl fact
The most expensive pearls would be those that are found in the wild oysters (if they happen to be an excellent quality). That happens rarely nowadays. We can legally call "natural" pearls if they are cultured or farmed from pearl oysters and freshwater mussels.
 |
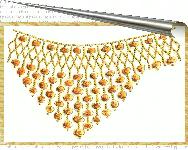
| Natural pink fresh water pearls |
DIY by the VZBRELO. Wood carving for beginner woodworkers
We have another guest post by the VZBRELO girls today (check out their previous post on the wooden eggs decoration here and see all their guest posts here). These nicely engraved eggs are not as hard to make as you could think! The carving is done with the help of a dreamel. I personally think that you could use this instruction for your first woodworking project!
-----------------

Hi all! Tatiana and Maria here again!
While it is spring still you might like the idea of having nice wooden eggs for your home decor in addition to the painted ones (see our previous instruction here).
While it is spring still you might like the idea of having nice wooden eggs for your home decor in addition to the painted ones (see our previous instruction here).
This project is for those who would like to get into woodworking. If you've never tried it before you can start with a project like this. We are about to show you how to do easy wood carving with a dreamel. These eggs are not wood masterpieces by any means, but it is a great project to try and see what you think of working with wood.

You will need:
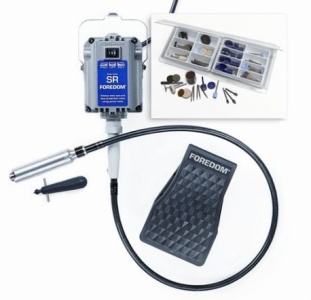
- An electric carving tool. We had the Dremel Stylus carver;
- Sanding bur for your Dreamel;
- The wooden eggs;
- A pencil;
- Fine sandpaper;
- Stains;
- Varnish (we had the acrylic lacquer);
- Brushes for the stain and the lacquer;
- An eraser.
Start with marking the outlines for your pattern that you are going to carve. Use the pencil and draw right on the eggs. Our negligence spoiled the whole picture on one of our eggs as we decided to make a rough layout. As a result, the pattern has shifted. So be careful at this stage. Note that you probably won't be able to "fix" the pattern with the Dreamel later. It is better to draw your design carefully right away, so you can just follow it with the tool.

Take the dreamel with the sandpaper bur and start removing wood. Hold the dreamel under a sharp angle to the egg and move it backwards and forwards, touching the wood lightly every time or it will get the burn marks from the high speed rotating sandpaper bur.

This is how it looks like when we are finished. Now all the pencil marks need to be removed with the eraser. They cannot be removed after staining (unless you sand the whole egg again and you will have to re-stain it then).

It's time to colour our souvenir eggs. We have a few shades of stain. You can give them an interesting look if you apply the dark stain first, let it dry, then use the fine sandpaper to sand the eggs' surface. This way you will remove the stain from the the protruding faces and return them the original wood colour. This will give the egg's ornament visual dimension. You can leave it like it is or you can paint it now with the lighter colour stain. Unleash your creativity! :)

You can varnish the eggs, if you like.
We hope your friends and family members will appreciate your cute handmade gifts!

Tatiana and Maria, the VZBRELO duet :)
We are always happy to new guests and friends:
Our VZBRELO community (Russian)
Online shop (Russian), another online shop (Russian)
Subscribe to:
Posts (Atom)