This is one more guest post by the VZBRELO girls. You can find a list of all their "behind the scene" post here.
Tatiana tells a story of making this nice carved bowl:
-----
Hello all! Today I would like to invite you to watch what is happening "behind the scene" and show you how I made a decorative wooden bowl.
This is not a traditional wood carving process. We call it a transitional step between the traditional carving and chainsaw carving :)
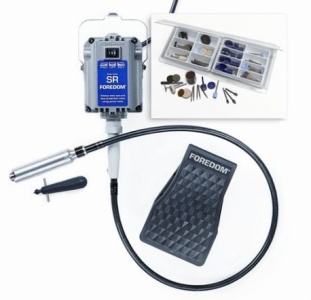
I've chosen the beech wood for my project. My tool for the job was a Dremel multi-tool with a flexible shaft and my favorite cutter. I loved it ever since I used it for my diploma project at school. It served me faithfully all this time despite the repeated use on all sorts of hardwoods.
Wood is a natural material, so it always inspires me to create natural motives. I've come up with an idea to carve a bowl in a form of a curved leaf. I have not sketched my leaf hoping to give it a true free form. I wanted to challenge myself as usually I am not good at working with no sketch. I outlined my leaf straight on my piece of wood.
I took a smaller cutter for a more precise work after the rough shape of the leaf had been cut out.
At that point I realized that I needed a visual before I could continue. I used a piece of plasticine to make a model for a better understanding of what to do next.
I noticed my mistakes right away. Let's see if I could fix them...
Safety is not as useless procedure as it might seem at the first glance :) Beech wood has a large number of beautiful shiny medullary rays... which are very painful when fly off into your eyes!
In fact, it would be a good idea to wear a good mask too (that you can see in this picture that I did not wear).
Here you can see that I achieved the desired shape. Next step was to start leveling the surface with a sand paper bur.
The next step could make a perfectionist happy :) I used a bur with a polishing stone first, and then a fine sandpaper to manually polish the bowl. The process was nice and almost endless!
We carve our logo not because we want to brag. We sign all our works to prove that we take responsibility for our products' quality.
Let's begin the magic! I oiled the bowl. The beech wood changed its color. It became saturated from pink to red-brown. Then I polished it and the bowl started to shine and shimmer in the sun.
Then it needed to dry well, get more polishing and more oiling. This bowl is a great item for a person who likes to touch things (I am one of such people too, so it was hard for me to let it go and stop touching it!)
This project is finished, thank you for watching! Off I go to work on my next project :)
Tatiana
You can visit us at:
Online shop (Russian), another online shop (Russian)