

 Posts
Posts


 |
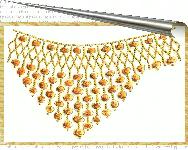
| Cf. Petit, Marc, Van Cleef & Arpels, Reflections of Eternity, Editions Cercle D'Art, 2006 Sold for US$ 161,000 |
Jewellery masterpieces
Friday, May 19, 2017


#jewelleryfacts365 289/365
Thursday, May 18, 2017
Well-crafted obsidian blades, as with any glass knife, can have a cutting edge many times sharper than high-quality steel surgical scalpels, the cutting edge of the blade being only about 3 nanometers thick. Even the sharpest metal knife has a jagged, irregular blade when viewed under a strong enough microscope; when examined even under an electron microscope an obsidian blade is still smooth and even.
 |
| Left: Obsidian tip under and electron microscope. Right: Steel point under an electron microscope. |
#jewelleryfacts365 288/365
Wednesday, May 17, 2017
Each volcano and in some cases each volcanic eruption produces a distinguishable type of obsidian, making it possible for archaeologists to trace the origins of a particular artifact.
 |
| A zoomorphic vessel found at the Temple of the Feathered Serpent (Serpiente Emplumada) at the Teotihuacan complex in Mexico City |
Nature's gems
 |
| Acquamarina (varietà i Berillo) with muscovite Nagar, Hunza Valley, Gilgit District, Northern Pakistan. 320x180 mm |
Video DIY on how to wood burn. Guest post by VZBRELO
Tuesday, May 16, 2017
This is a guest post by two ladies who chose woodworking as their profession. You can find a list of all their "behind the scene" and DIY posts here. They have quite a few of them in my blog! Today we have a chance to "peek over their shoulder" and to see how they actually work. Isn't it exciting? I was jumping on my chair waiting for the video to start! All I want now is to try the wood burning myself. See if it can inspire you in the same way!
-----------------------------
Hello to all visitors of the blog! Today we are happy to share a detailed video DIY that shows how to wood burn an ornament on a wooden vase. BTW, it looks like this ornament is hard to make, but it is easier than you think. Watch for yourself!

Enjoy!
Here how the vase looks like when finished:

We hope this video DIY is going to be useful to some of you!
Come and visit us in our blogs:
Maria and Tatiana of VZBRELO
#jewelleryfacts365 287/365 Diamond facts
After polishing, the diamond is re-examined for possible flaws, either remaining or induced by the process. Those flaws are concealed through various diamond enhancement techniques, such as re-polishing, crack filling, or clever arrangement of the stone in the jewelry. Remaining non-diamond inclusions are removed through laser drilling and filling of the voids produced.
 |
| Cracks and fractures in a diamond reduce its clarity, but can be treated by filling. Fracture filling utilises a glass-like material, which has similar optical properties to that of diamond. It will improve the diamond’s appearance by almost two clarity grades but is not a permanent treatment. Most obvious evidence of fracturefilled diamonds can be found in the bright flashes of changing colour that can be seen under proper lighting. Other evidence is the presence of bubbles in the fracture of the filler, or ‘crackled appearance’ of the filler. All these can be picked up by 10x magnification. [source]. |

#jewelleryfacts365 286/365 Diamond facts
Monday, May 15, 2017
Most diamonds contain visible non-diamond inclusions and crystal flaws. The cutter has to decide which flaws are to be removed by the cutting and which could be kept.
 |
| This diamond has clearly visible inclusions; some of them are circled in red in the photo. |

Subscribe to:
Posts (Atom)