


Jewellery masterpieces
Tuesday, December 29, 2015
 |
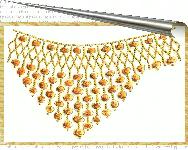
| GOLD, VITRUM PASTAE, ENAMEL, PEARL AND DIAMOND PENDANT |
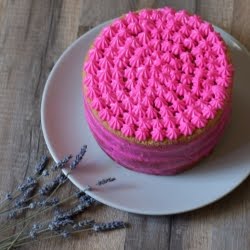
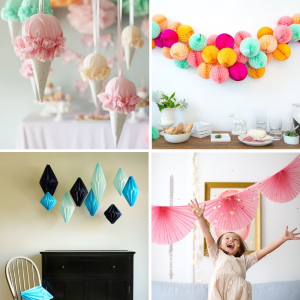
DIY by Victoria Belichenko. A cup warmer.
Today I have an absolutely awesome DIY by Victoria Belichenko. Now, when Christmas is over it is time to start collecting ideas for the St.Valentine's Day. Would a cup warmer like this make a great gift for your Valentine? What do you think?
--------------
Hello all, my name is Victoria. I would like to share a gift idea with you. It might look complicated, but it is not that hard to make. Give it a try!

You will need:
* a cup
* a few pieces of different colors of felt or fleece
* a piece of cardboard
* scissors
* stitching
* a needle
* 2 buttons
* a piece of the Velcro fastener
Start with choosing your colors and measuring your cup.

Draft a suit pattern following your measurements. The outer diameter of your cup (minus the cup's handle) is the length of your rectangle. Its width is the height of the future suit. Remember that it needs to be practical and do not make it too high. Note how the neck line goes a bit lower. This is done not so much for the looks, but for more comfortable drinking from the cup that is going to wear the suit.

Cut out all the pieces from a piece of cardboard separately. Place them onto the fabric and cut them out from the fabric.

Assemble the suit.

Sew the pieces together with a straight short stitch.


That's it!

All is left is to sew the buttons and the Velcro fastener on (you can also glue them with the hot glue instead of sewing them).

Try it on your cup:

Which one do you prefer? :)

I hope the DIY is going to be helpful to some of you!
Victoria Belichenko


Throwback Thursday
Thursday, December 24, 2015
 |
| Great Ocean Road, Melbourne, Australia, 2011 The first people who landed here were the only two who survived when a ship crushed by the shore. |


Jewellery masterpieces. Antique brooch
Tuesday, December 22, 2015
 |
| HUSSON, Classical brooch in the style of the antique, Gold Enamel Emerald Diamond, Marks: 'Husson' French, c.1880 |
DIY guest post. Gingerbread house
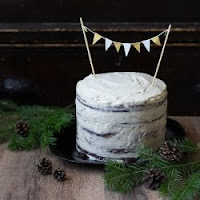
I was impressed with Irina's gingerbread house and invited her to become my guest blogger. Isn't her house gorgeous? I have never made a gingerbread house yet. This looks like fun! I hope to make one with the kiddo one day. Irina generously shared her tricks and secrets on how to succeed in this project. Thank you, Irina!
-----------------
Hello friends! My name is Irina, I am learning how to be a pastry chef in Finland. In this DIY I am going to show you how to make a gingerbread house.
This one is standing on my table. I took a few pictures while I was making it just for you!

You will need:
- sugar syrup (you may use honey if you do not have the sugar syrup): 150 g (5.3 oz.)
- sugar: 250 g (8.8 oz)
- water: 150 ml
- baking soda: 12 g (1 tsp)
- butter: 230 g (8 oz)
- ground cinnamon 6 g (1 teaspoon without a heap above it)
- ground clove: 3 g (1 teaspoon)
- ground ginger: 3 g (1 teaspoon)
- wheat flour: 575 g (900 ml or 20 oz)
1. Bring to boiling: syrup, sugar and water,
2. Put butter in a bowl and pour your mixture carefully into in. Stir gently. (Use planetary mixer for this, if you have one).
3. Let your mixture to cool down to 104 degrees (it will take about one hour).
4. Sift together: flour, baking soda and the spices. Then add them slowly to the bowl while mixing the dough.
5. Wrap the dough in plastic and leave it in the fridge over night (or longer).
6. Roll the dough. Make it 1/5" in thickness for the house foundation and twice as thinner for other house parts.

Cut out the house parts. Bake them for 6-8 minutes at 375 degrees until the brown color.

Wait for the house parts to cool down before decorating them. You can use the sugar icing for drawing on it and for gluing edible decorations to it, such as sweets, nuts and spices (cinnamon sticks, star anise and cloves).
The sugar icing recipe:
Beat 1 egg white while gradually adding 300 ml of powdered sugar. If you want your icing to harden quickly and /or have a slightly sour taste, then add about a teaspoon of lemon juice.
Use a pastry bag (preferably disposable) to apply the icing to your gingerbread house parts, You can also use a usual zip bag, just cut off one of the corners to get a small hole.
Use food dyes if you want to add some color to your icing. Squeeze the first drops of the icing on a plate (you will release the excess air and will be able to draw an even line.)


Wait until all the icing hardens before you start putting the house together. The hardening takes about 24 hours.
Use the melted sugar to glue the house parts together. Put it in a pan and wait for it to start melting. Turn down the temperature when it happens. Do not let the sugar boil and get brown. Move the pan to the side, away from the burner, if you notice that it is about to happen. Brown (burned) sugar changes the taste and we do not want that to happen.
Dip your gingerbread house parts in the melted sugar and glue them together. Do this quickly, before your sugar has a chance to boil and go brown.

Finish putting your house together and evaluate how it looks like. You might want to hide the seals by decorating them with the icing or add more sweets, etc.

House can be stored for 3 weeks or even longer! I wish you delicious and beautiful houses!
Visit my blog for more ideas and recipes: finbake.ru (Russian)
Merry holidays!
Irina


Bead Day, Christmas tree decorations by Claudia Cattaneo
Saturday, December 19, 2015
 |
| Little house box (pdf instruction from Etsy) |
Jewellery masterpieces. Jewellery by JAR
Friday, December 18, 2015
 |
| Lilac brooches by JAR (Joel Arthur Rosenthal), diamond, lilac sapphire, garnet, aluminum, silver, and gold, 2001. (Interview) |


Throwback Thursday
Thursday, December 17, 2015
This is Cooks' cottage is located in the Fitzroy Gardens, Melbourne, Australia. The cottage was constructed in 1755 in the English village of Great Ayton, North Yorkshire, by the parents of Captain James Cook, James and Grace Cook.
 |
| 2011, April |


Subscribe to:
Posts (Atom)